Key Points
- Clean and prepare the wall by removing dirt, filling holes with spackling compound, sanding the surface smooth, and applying primer to repaired areas.
- Match the original paint color and sheen using leftover paint, professional color matching, or a paint chip sample to ensure seamless blending.
- Apply touch-up paint using feathering techniques and minimal paint layers, then inspect the area under different lighting conditions to confirm uniformity.
Brush Up Your Walls: The Art of Perfect Paint Touch-Ups
Have you ever noticed those unsightly scuffs or tiny nail holes on your walls and wondered if there’s a way to fix them without repainting the entire room?
Do you wish your walls could maintain that freshly painted look despite daily wear and tear?
In this guide, you’ll discover straightforward techniques to seamlessly touch up your wall paint, preserving your home’s charm.
By following these steps, you’ll save time and effort on your interior home painting, ensuring your walls remain impeccable.
If you prefer professional assistance, feel free to reach out to Tribble Painting Company by giving us a call or filling out our contact form.
We’re here to help make your home look its best!
Tools and Materials Needed
To achieve a flawless paint touch-up, it’s essential to have the appropriate tools and materials ready.
This preparation ensures the process is efficient and results in a professional finish.
Tools
- Paint Applicators: Utilize small brushes, mini rollers, or foam brushes for precise application, ensuring consistency with the original paint job.
- Putty Knife: Necessary for applying spackling compound to fill holes or cracks, creating a smooth surface.
- Sandpaper: Opt for 120-grit sandpaper to smooth out repaired areas, promoting better paint adhesion.
- Cleaning Supplies: Prepare damp and dry rags along with a mild detergent to clean walls before painting, removing dirt and grease that can affect the finish.
- Painter’s Tape: Use to protect adjacent areas and ensure clean lines during the touch-up process.
- Paint Mixer: A mixing stick or a power drill mixer attachment helps in thoroughly blending the paint, ensuring color uniformity.
- Face Mask or Respirator: While optional, wearing a face mask or respirator can protect against inhaling paint fumes, especially in poorly ventilated areas.
Materials
- Matching Paint: Ideally, use paint from the original batch to ensure color consistency. If unavailable, obtain an accurate match from a reputable paint supplier.
- Interior-Grade Latex Primer: Applying primer to repaired areas ensures better paint adhesion and a uniform finish.
- Spackling Compound: This compound is used to fill in holes, dents, or cracks, creating a smooth surface for painting.
- Paint Thinning Agent: Depending on the type of paint, use water for latex paints or turpentine/mineral spirits for oil-based paints if thinning is necessary.
Equipped with these tools and materials, you’re well-prepared to tackle paint touch-ups and maintain the pristine appearance of your walls.
Step 1: Identify Areas Needing Touch-Up
Before initiating any touch-ups, it’s crucial to assess your walls to determine which sections require attention.
This evaluation ensures that your efforts are both efficient and effective.
When to Touch Up vs. When to Repaint
- Minor Imperfections: Small holes, scuffs, or scratches are typically suitable for touch-ups. Addressing these promptly can prevent further deterioration and maintain the wall’s appearance.
- Major Damage: Extensive discoloration, peeling, or large damaged areas may necessitate repainting the entire wall. In such cases, a full repaint ensures a consistent finish and restores the room’s aesthetic appeal.
Inspecting Under Proper Lighting
- Natural Light: Examine walls during daylight hours by opening curtains or blinds. Natural light reveals imperfections that might be overlooked under artificial lighting.
- Artificial Light: In the absence of sufficient daylight, use a flashlight. Hold it flat against the wall to cast shadows over dents and scratches, making them more noticeable.
- Tactile Inspection: Run your hand gently over the wall surface. This method helps detect subtle dents or raised areas that might escape visual inspection.
By meticulously evaluating your walls using these techniques, you can pinpoint areas that need touch-ups, ensuring a smoother and more uniform paint job.
Step 2: Prepare the Wall Surface

Proper preparation is essential for achieving a seamless touch-up that blends with your existing paint job.
Follow these steps to ensure the wall is ready:
Clean the Area Thoroughly
- Remove Dirt and Dust: Gently wipe the targeted spot with a damp sponge or cloth to eliminate surface dirt and grime. For stubborn stains, a mild detergent mixed with water can be effective. Ensure the area is completely dry before proceeding.
Repair Any Wall Damage
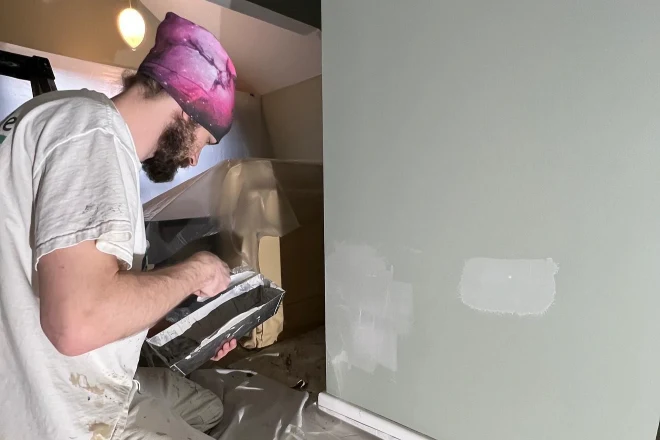
- Address Minor Imperfections: For small holes or cracks, apply spackling compound using a putty knife, ensuring the filler is level with the wall surface. Once dry, sand the area with 120-grit sandpaper until smooth.
- Handle Larger Blemishes: Significant dents or holes may require a drywall patch. After placing the patch, apply joint compound over it, feathering the edges to blend with the surrounding wall. Sand smoothly once dry.
Protect Adjacent Areas
- Use Painter’s Tape: Apply painter’s tape around the touch-up area to shield trim, baseboards, or adjoining walls. This ensures crisp lines and prevents accidental paint application on unintended surfaces. Follow the link for detailed guidance on how to use painter’s tape.
By meticulously preparing the wall, you set the foundation for a touch-up that seamlessly integrates with the existing paint, maintaining the aesthetic appeal of your space.
Step 3: Match the Paint Color and Sheen
Achieving a seamless touch-up requires accurately matching both the paint color and sheen.
This ensures the repaired area blends indistinguishably with the surrounding wall.
Techniques for Accurate Color Matching
- Utilize Leftover Paint: If you have leftover paint from the original application, using it can provide the closest match. Ensure the paint is thoroughly stirred to maintain consistency.
- Professional Color Matching: If the original paint isn’t available, take a sample from your wall to a local paint store, such as Benjamin Moore. They can analyze it to create a precise match. Cutting a small, inconspicuous section or using a paint chip from behind an outlet cover can serve as a sample.
- Paint Matching Apps: Some smartphone applications can help identify paint colors by analyzing photos of your wall. While convenient, these apps may not always be perfectly accurate due to lighting variations.
Importance of Sheen Consistency
The sheen, or finish, of the paint affects how light reflects off the surface.
Common sheens include flat, eggshell, satin, semi-gloss, and gloss.
Follow the link to learn more about paint sheen differences.
Using a touch-up paint with a different sheen than the original can result in noticeable patches, even if the color matches perfectly.
Therefore, it’s crucial to identify and use the same sheen as the existing paint to achieve a uniform look.
By meticulously matching both the color and sheen, your touch-up efforts will seamlessly integrate with the original paint job, preserving the aesthetic integrity of your space.
Step 4: Prime the Repaired Area (If Necessary)
Properly priming repaired sections is crucial to ensure the touch-up paint adheres well and blends seamlessly with the existing wall.
When to Prime
- Repaired Surfaces: If you’ve filled holes, cracks, or other imperfections with spackling compound, it’s essential to apply primer over these areas. Priming prevents the patched spots from absorbing paint differently than the rest of the wall, which can cause noticeable discrepancies.
- Stained Areas: For sections with stains or discoloration, priming helps to block these imperfections from bleeding through the new paint.
Choosing the Right Primer
- Interior-Grade Latex Primer: This type of primer is suitable for most interior wall surfaces and works well with latex paints.
- Stain-Blocking Primer: If you’re dealing with water stains, smoke damage, or other persistent discolorations, opt for a primer specifically designed to block stains.
Application Tips
- Clean the Area: Ensure the surface is clean and free from dust or debris before applying primer.
- Use Appropriate Tools: Apply primer with a small brush or roller, depending on the size of the area.
- Feather the Edges: Extend the primer slightly beyond the repaired spot to help the touch-up blend with the surrounding wall.
- Allow Proper Drying Time: Follow the manufacturer’s instructions for drying times before proceeding with painting.
By diligently priming the repaired areas, you enhance the adhesion and appearance of the touch-up paint, contributing to a flawless and long-lasting finish.
Step 5: Apply the Touch-Up Paint

Applying touch-up paint correctly is essential to ensure the repaired area blends seamlessly with the existing wall.
Application Techniques
- Using the Right Applicator: Choose an applicator that matches the original application method. If the wall was initially painted with a roller, use a roller for the touch-up. For brush-painted walls, use a brush. This consistency helps maintain the texture and appearance of the wall.
- Feathering the Edges: Begin painting at the center of the touch-up area and extend outward with light, overlapping strokes. Gradually taper the paint application as you move toward the edges to blend the new paint with the existing wall. This technique, known as feathering, minimizes the visibility of the touch-up spot.
- Minimal Paint Usage: Apply a small amount of paint to avoid buildup, which can lead to noticeable differences in texture and sheen. It’s better to apply multiple thin coats than one thick coat. Allow each coat to dry completely before applying the next to assess the need for additional layers.
By carefully applying the touch-up paint with these techniques, you can achieve a finish that closely matches the original paint job, maintaining the aesthetic appeal of your Ann Arbor home.
Step 6: Evaluate and Blend
After applying touch-up paint, it’s essential to assess the area to ensure it integrates seamlessly with the existing wall.
Assessing the Touch-Up
- Allow Adequate Drying Time: Let the paint dry completely, as wet paint can appear different in color and sheen.
- Inspect Under Various Lighting Conditions: Examine the touch-up spot under different lighting—natural daylight, evening light, and artificial sources—to ensure consistency.
- Check for Texture and Sheen Uniformity: Ensure the repaired area matches the surrounding wall in both texture and sheen to avoid noticeable discrepancies.
Blending Techniques
- Feathering the Edges: If the touch-up area stands out, lightly feather the edges by extending the paint slightly beyond the original repair zone with minimal paint on the brush.
- Use of Paint Pens for Minor Imperfections: For small nicks or scratches, paint pens can offer precise application, aiding in better blending with the existing paint.
- Consider Repainting Larger Sections: If blending proves challenging and the touch-up remains visible, repainting the entire wall or section from corner to corner may be necessary for a uniform appearance. Follow the link for tips on how to paint an interior wall.
By meticulously evaluating and employing effective blending techniques, you can achieve a touch-up that harmoniously integrates with your wall’s original finish, maintaining the aesthetic appeal of your Ann Arbor home.
Step 7: Clean Up and Store Materials

Proper cleanup and storage after touching up paint ensure the longevity of your tools and the readiness of materials for future use.
Proper Cleanup
- Clean Brushes and Rollers Immediately: After completing your touch-ups, wash brushes and rollers promptly to prevent paint from drying on them. For latex paints, use warm soapy water; for oil-based paints, use the appropriate solvent.
- Remove Painter’s Tape Carefully: Peel off painter’s tape at a 45-degree angle while the paint is still slightly tacky to avoid peeling off any dried paint.
- Dispose of Materials Responsibly: Dispose of used paint cans, solvents, and other materials in accordance with Ann Arbor’s local waste management regulations. Many communities have designated facilities for hazardous waste disposal.
Storing Leftover Paint
- Seal Paint Cans Tightly: Ensure the lids are securely fastened to prevent air from entering, which can cause the paint to dry out. You can place a piece of plastic wrap over the opening before sealing to ensure an airtight fit.
- Store in a Cool, Dry Place: Keep paint cans in a location where temperatures remain consistent and above freezing. Avoid places with high humidity to prevent rusting of the cans.
- Label Cans for Easy Identification: Mark each can with the room or area where the paint was used and the date of application. This practice simplifies finding the right paint for future touch-ups.
By diligently cleaning your tools and properly storing leftover paint, you ensure that both remain in good condition, facilitating easier maintenance of your home’s aesthetic appeal in the future.
Common Mistakes to Avoid
Ensuring a flawless touch-up requires attention to detail and avoiding common pitfalls.
Here are key missteps to steer clear of:
- Skipping Surface Preparation: Neglecting to clean and repair the area can lead to poor paint adhesion and visible imperfections. Always ensure the surface is clean and smooth before applying touch-up paint.
- Mismatched Paint Color or Sheen: Using a touch-up paint that doesn’t match the existing wall color or sheen can result in noticeable spots. It’s crucial to use the same paint color and finish for seamless blending.
- Overloading the Brush or Roller: Applying too much paint can cause drips and uneven application. Load your brush or roller with just enough paint to cover the touch-up area without excess.
- Neglecting Drying Times: Rushing between coats can affect the finish quality. Allow adequate drying time as per the paint manufacturer’s recommendations before applying additional coats or removing painter’s tape.
By being mindful of these common errors, you can achieve a professional-looking touch-up that seamlessly blends with your existing wall paint.
Elevate Your Home’s Aesthetic with Tribble Painting Company
Maintaining pristine walls enhances your home’s beauty and longevity.
When you’re ready for a professional touch, Tribble Painting Company offers expert interior painting services tailored to your needs.
Our experienced painters ensure meticulous attention to detail, delivering a flawless finish that revitalizes your living spaces.
Trust Tribble Painting Company to transform your Ann Arbor home with unparalleled craftsmanship!

