Master Crisp Lines and Hassle-Free Painting with Painter’s Tape
Ever find yourself struggling with wobbly lines or annoying paint bleed? Or maybe you’ve had painter’s tape that just won’t come off cleanly, peeling half the paint with it?
When used correctly, painter’s tape can help you achieve professional results without the mess or frustration.
In this guide, we’ll cover everything you need to know about using painter’s tape on walls, ceilings, trim, and even textured surfaces to create those perfectly clean lines.
From choosing the right type of tape for different surfaces to step-by-step instructions on applying and removing it without a hitch, you’ll be set to handle any painting project with confidence.
By the end, you’ll know exactly how to make your paint job in Howell, MI, look polished, no matter what area you’re tackling.
Ready to paint like a pro? Let’s dive in.
Why Use Painter’s Tape?

Using painter’s tape is an essential step for anyone looking to achieve professional-looking results without hassle.
From clean edges to protecting surfaces, painter’s tape gives both DIYers and experienced painters an easy way to create precise, mess-free lines.
Unlike regular masking tape, painter’s tape is specially formulated to be removed cleanly, reducing the risk of peeling paint and ensuring smooth finishes every time.
Key Benefits of Painter’s Tape
- Achieve Straight Lines: Painter’s tape helps you create crisp, straight lines along trim, walls, and ceilings. This is especially useful when working around detailed areas, like crown molding, where clean edges are a must.
- Protect Surfaces: By using the right painter’s tape, you can mask off sections of your room, preventing unwanted paint splatter on baseboards, ceilings, and textured surfaces like stucco or brick.
- Easy to Remove: High-quality painter’s tape is designed to come off smoothly without damaging fresh paint or leaving a sticky residue behind. For best results, remove painter’s tape at a 45-degree angle while the paint is still wet, or score it with a putty knife if the paint has dried.
- Suitable for Delicate and Textured Surfaces: Certain painter’s tapes, like blue tape, are available in different levels of adhesion. Low-adhesive varieties are ideal for delicate surfaces, like freshly painted walls, while stronger options are perfect for textured surfaces like stucco or concrete.
Choosing and using painter’s tape correctly can make a huge difference in the final outcome of any paint job.
With the right approach, even intricate designs and multi-surface projects become much easier, resulting in a polished finish without the frustration of messy edges.
Choosing the Right Type of Painter’s Tape

Not all painter’s tape is the same, and selecting the right tape can make a huge difference in your project’s results.
Each type is designed for specific surfaces, textures, and purposes, so matching your tape to your needs is essential.
1. Multi-Surface Painter’s Tape
Ideal for most common painting jobs, multi-surface painter’s tape provides medium adhesion, making it versatile for indoor projects on various surfaces.
- Best for: Painted walls, trim, baseboards, tile, and glass.
- Why choose it: This blue tape can be left on for up to 14 days without leaving a sticky residue, and it’s easy to apply and remove for crisp, clean lines.
2. Textured Surface Painter’s Tape
When you’re working with rougher surfaces, you’ll need painter’s tape that sticks more securely.
- Best for: Rough materials like brick, concrete, stucco, and textured wood.
- Why choose it: This high-adhesion green tape is specifically made to stick to uneven surfaces and can handle tougher textures without peeling off.
3. Delicate Surface Painter’s Tape
Some surfaces are more fragile and require a lighter touch.
Delicate surface painter’s tape is perfect for areas where you want to avoid damaging the paint or finish.
- Best for: Wallpaper, freshly painted surfaces, or painted wood that may be prone to chipping.
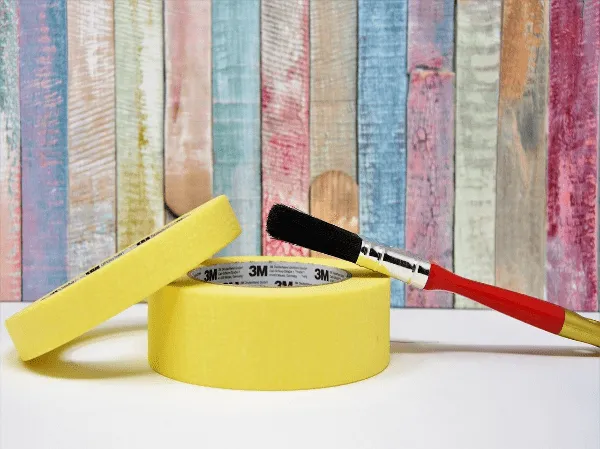
- Why choose it: Low-adhesion yellow tape ensures easy removal, minimizing the risk of peeling paint or damaging delicate finishes.
4. Exterior Painter’s Tape
Outdoor painting comes with its own set of challenges, including exposure to weather changes.
Exterior surface painter’s tape is designed to withstand these elements.
- Best for: Outdoor projects on surfaces like vinyl, metal, painted wood, and glass.
- Why choose it: This tape has an extra-strong adhesive that resists moisture and can stay on longer without breaking down, even in rain or humidity.
5. Decorative Shape and Fine Line Painter’s Tape
For those looking to add a creative touch, decorative tapes offer options for lines, shapes, and patterns.
- Best for: Crafting stripes, borders, or detailed designs on walls and other surfaces.
- Why choose it: Available in various widths and shapes, these fine line tapes make it easy to create intricate designs for an artistic effect in any room.
Choosing the right painter’s tape gives you more control over your painting project and helps ensure a polished, professional look.
Make sure to select the tape that best fits the surface you’re working on, whether it’s a smooth wall, textured stucco, or delicate wallpaper, for results that last.
Preparing Surfaces for Painter’s Tape
Before you even start applying painter’s tape, it’s essential to prep your surfaces.
Taking time for preparation will help the tape stick properly and prevent paint bleed, ensuring a neat finish.
This step is often overlooked, but it’s key to a smooth, frustration-free project.
Follow the link for more details on how to prep a house for painting.
Cleaning Walls, Ceilings, and Trim
Dust, dirt, and grease can keep painter’s tape from sticking well, so it’s crucial to start with a clean surface.
- Why it matters: Dust or grease buildup can prevent the tape from forming a tight seal, leading to messy edges when you remove painter’s tape.
- How to clean: Use a damp rag to wipe down walls, trim, and ceilings. For greasy spots—like around kitchens—use a mild soap and water solution. Be sure to rinse and allow surfaces to dry completely before applying tape. Follow the link to discover how to clean painted walls after your project is complete.
Drying Times
A dry surface is essential for painter’s tape to work effectively.
Any moisture can interfere with adhesion, especially on newly cleaned or freshly painted surfaces.
- Recommendation: After cleaning, wait until the surfaces are fully dry. For fresh paint, allow at least 24 hours for it to set before taping over it, or follow the manufacturer’s drying guidelines to avoid peeling paint when you remove the tape.
Preparing the walls and trim properly not only helps the tape stick better but also ensures your final results look sharp and professional.
How to Apply Painter’s Tape on Different Surfaces

Applying painter’s tape correctly is essential for sharp lines and clean edges, especially on challenging surfaces like textured walls, trim, or ceilings.
Here’s how to use painter’s tape effectively for various areas of your home.
Applying Tape to Walls and Ceilings
Applying painter’s tape to walls and ceilings requires careful placement to keep the paint exactly where you want it.
- Walls: Identify areas near the ceiling, around windows, or fixtures where you need a precise line. Start by unrolling blue tape in one-foot sections, pressing it down with your fingers or a putty knife to prevent gaps where paint might seep through. Follow the link to discover how to paint an interior wall the best way.
- Ceilings: To avoid overlapping ceiling paint, apply the tape directly along the ceiling’s edge, ensuring it’s smooth and fully adhered. Press firmly along the tape with a putty knife to create a clean seal.
Taping Corners and Edges
Corners and edges can be tricky, but with the right technique, you can create straight lines that look polished and professional.
- Corners: Instead of taping directly into the corner, apply tape about 1/8-inch from the corner to make it easier to achieve a straight line.
- Edges: For trim, moldings, or doorframes, carefully align the tape along the edge and press it down. Use short sections to maintain control and ensure a smooth line.
Applying Tape on Trim and Baseboards
Properly taping trim and baseboards will protect them from unwanted splashes while creating a clean separation between surfaces.
- Process: Apply the tape in 6-inch segments, gently pressing it into place with a putty knife for a tight seal.
- Protecting Floors: For baseboards, apply painter’s tape along the bottom edge. If you’re working over carpet, place masking tape beneath the baseboard and add a layer of drop cloth or plastic sheeting to protect the carpet from drips.
Applying Tape on Textured or Rough Surfaces
Textured surfaces like stucco, brick, or textured wood require a stronger adhesive to hold the tape securely in place.
- Use high-adhesion tape: Textured surface painter’s tape is designed to grip uneven areas. Press down firmly to ensure it sticks properly.
- Test a small area: Before taping the entire wall, test a small section to ensure the tape holds. For rough surfaces, it’s essential to press along the tape edges to prevent paint from bleeding through.
Applying painter’s tape correctly on each type of surface helps achieve clean, sharp lines while keeping trim, ceilings, and baseboards free of unwanted paint.
Each of these techniques can save you time and create a more polished final look.
Removing Painter’s Tape Properly
Knowing when and how to remove painter’s tape is just as important as applying it correctly.
Removing it at the right time and using the right angle ensures you avoid peeling paint and achieve clean lines.
Timing for Removal
Removing painter’s tape at the right moment can help prevent smudging or tearing the paint.
- Wet paint removal: For the sharpest results, remove the tape while the paint is still wet. This reduces the risk of peeling and allows you to catch any small leaks before they dry.
- Dry paint removal: If you need to wait until the paint dries, score the edge of the tape gently with a putty knife before pulling it away. This step breaks any dried paint seal between the tape and the wall, preventing chipping.
Tips for Minimizing Paint Peeling
Using high-quality painter’s tape and following careful removal techniques will help avoid unnecessary damage.
- Angle matters: Pull the tape back at a consistent 45-degree angle. This helps release the tape smoothly without pulling up the paint.
- Patience is key: Avoid rushing or pulling too quickly, especially on textured surfaces. Take it slow for the best finish.
By removing painter’s tape at the ideal time and following these simple steps, you’ll get clean, professional-looking edges on every paint job.
Proper removal can make a significant difference in the final appearance, leaving your space looking well-finished and expertly painted.
Transform Your Space with Tribble Painting Company’s Expert Touch
While DIY painting can be rewarding, it’s not always easy to get professional results, especially on larger projects or tricky areas like ceilings and textured walls.
Tribble Painting Company is here to take the hassle out of your interior and exterior painting needs in Howell, MI, offering quality workmanship and attention to detail.
If you’re ready for a flawless finish without the stress, our experienced team is here to help.
Fill out our contact form today, or give us a call to get started on your next project!

