Key Points
- A skim coat smooths damaged, textured, or uneven walls using joint compound before priming.
- Primer seals porous surfaces like new drywall or skim-coated walls and improves paint adhesion.
- For best results, apply a skim coat first to fix imperfections, then prime to ensure long-lasting, even paint coverage.
Smooth Moves: The Secret to Flawless Walls Starts Here
Ever paint a wall and realize it still looks rough, no matter how many coats you roll on?
Wondering why that professional finish you imagined looks more like a rushed weekend project?
This post explains the real difference between skim coating and priming—two essential steps that often get confused but serve totally different purposes.
You’ll learn when to use each one, how they work together, and how to avoid the most common DIY pitfalls.
By the end, you’ll know exactly how to prep your walls for a sleek, long-lasting paint job that looks like it came straight out of a design magazine.
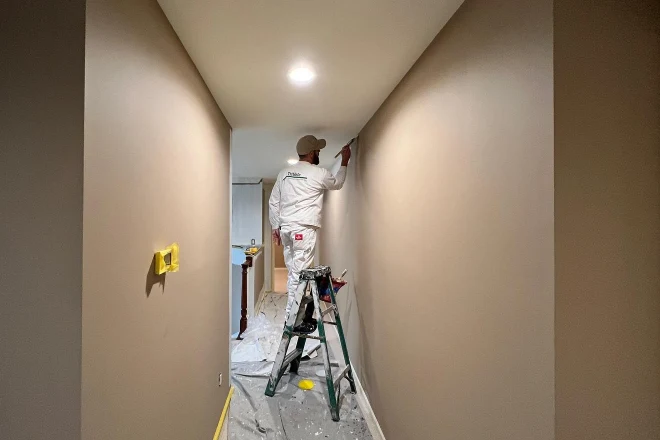
If you’d rather skip the trial and error, just call Tribble Painting Company or fill out our contact form—we’ll handle the interior painting prep so you can enjoy perfect walls.
Skim Coat vs Primer: What’s the Real Difference?
Choosing between a skim coat vs. primer can make or break the final look of your walls.
While they might seem interchangeable, they serve very different roles in prepping your space—especially if you’re painting in an older Ann Arbor home or tackling a DIY upgrade.
What Is a Skim Coat?
A skim coat is a thin layer of joint compound spread over walls or ceilings to create a smooth surface for painting.
It’s commonly used to fix cosmetic flaws and level out uneven drywall.
- Applied with a drywall knife or spray, it hides dents, patches, cracks, and light texture.
- You’ll often need two coats for better coverage, with sanding in between for a fine finish.
- Works best on new drywall, old textured walls, or surfaces with visible seams or damage.
- Choose ready-mixed or powdered compound depending on your comfort level and project size.
A skim coat doesn’t seal or bond—it corrects the surface, making it visually flawless before primer is added.
What Is Primer?
Primer is the prep step that ensures your paint sticks, covers evenly, and lasts longer.
It seals porous materials and improves adhesion between the wall and your top coat.
- Primer often contains a sizing agent, such as PVA (polyvinyl acetate), which ensures it soaks in evenly and prevents uneven absorption.
- Oil-based primer is stronger and ideal for covering peeling paint, water stains, or crayon marks.
- Primer helps create a uniform surface and blocks bleed-through from prior wall issues.
Unlike a skim coat, primer doesn’t fix physical imperfections—it prepares the wall chemically for paint.
This is why it’s crucial to use paint primer for exterior and interior painting.
Key Differences Between Skim Coating and Priming
Here’s where the difference becomes clear:
- Purpose:
- Skim coat: creates a smooth surface by fixing flaws.
- Primer: prepares the wall to hold paint properly and evenly.
- Material:
- Skim: made from joint compound or drywall compound (aka “mud”).
- Primer: a thin, paint-like product, often water or oil-based.
- Order of Application:
- Always skim coat first, then prime after the surface is sanded and dry.
- End Result:
- Skim gives you a flat, perfect canvas.
- Primer ensures your topcoat stays vibrant, durable, and even.
Together, skim coating and priming form a two-step prep process that leads to a pro-level smooth finish—one that stands up to time and changes in light.
When Do You Need a Skim Coat?
Not every project needs a skim coat, but when it’s the right call, skipping it can lead to regret down the line.
In Ann Arbor and surrounding communities, where many homes feature textured walls or patched surfaces, skimming is often the fastest way to make walls look new again.
Common Wall Problems That Call for Skimming
You’ll want to reach for the joint compound when you see:
- Uneven drywall seams or pitted surfaces.
- Leftover texture from old design trends.
- Areas with peeling paint, cracks, or patched holes.
- New drywall with visible joints, especially if you’re after a fine, modern look.
If you’re trying to paint over walls that feel bumpy or inconsistent in lighting, a skim coat can give you a cleaner, more professional result.
Level 5 Finish Explained
A level 5 finish is the highest standard of drywall smoothness, according to the Gypsum Association.
It’s often requested for:
- Ceilings where light shows every flaw.
- Home theaters or media rooms where wall imperfections become more visible.
- Modern minimalist designs that demand perfectly even walls.
Achieving a level 5 look means applying a full skim coat across every square inch of the wall—no shortcuts.
If you’re aiming for a flawless backdrop, this is the method pros use.
When Do You Need Primer?

Even after applying a skim coat, using the right primer is essential for a successful paint job.
Without this step, your paint may absorb unevenly, peel, or fail to bond properly, especially in humid Michigan homes.
Priming Bare Surfaces
Primer isn’t just a formality—it’s a must-have on any untreated surface.
- New drywall, raw plaster, or freshly skim-coated walls are porous and need sealing.
- Use primer on these surfaces to reduce absorption and promote even top coat coverage.
- Priming before paint helps avoid dull spots and lets your paint roller glide smoothly.
Skipping primer here usually leads to wasted materials, rework, and uneven results.
Stain Blocking and Adhesion
If your drywall has stains, glossy finishes, or you’re painting over old oil-based paint, don’t skip the primer.
- Oil-based primer works well to block smoke, mud, or water damage on ceilings or walls.
- It boosts adhesion on slippery or previously painted surfaces.
- Helps your new paint grab on without flaking—key if you’re applying multiple coats.
For most interior rooms, priming creates a clean slate that locks in old messes and sets up the top coat to last.
How Skim Coat and Primer Work Together
Skimming and priming serve different purposes—but together, they lay the groundwork for a smooth, durable finish that looks flawless and lasts for years.
- Skim coating with drywall compound fixes imperfections and levels the surface.
- After it dries, you’ll need to sand and apply primer to seal the compound before paint goes on.
- Using a paint roller, apply two coats of primer on trouble spots or newly skimmed areas.
- The primer prevents uneven absorption and improves adhesion for your chosen top coat.
Ideal Conditions for Using Both Methods
To get pro-level results in your Ann Arbor home, follow this order:
- Apply a thin layer of skim coat to level out flaws.
- Let it dry fully, then do a light sanding to smooth it out.
- Cover nearby floors with plastic sheeting to protect from dust and splatter.
- Apply a coat of latex primer or oil-based primer, depending on the wall type.
- Only then are you ready to paint.
By putting in the time to prep properly, you avoid bubbling, patchiness, and costly redos—especially in high-visibility areas like the ceiling or main living room.
Frequently Asked Questions
Do I Need Primer After Skim Coating?
Yes—A skim coat smooths damaged, textured, or uneven walls using joint compound before priming.
Primer seals porous surfaces like new drywall or skim-coated walls and improves paint adhesion.
For best results, apply a skim coat first to fix imperfections, then prime to ensure long-lasting, even paint coverage.
- Apply a high-build primer to seal the surface and prep it for a smooth top coat. This step helps cover fine scratches from sanding and ensures better roller glide.
- Use a roller or spray method to apply evenly, especially over repaired seams or patches. Skipping this step often leads to visible differences in sheen and color across your walls.
Should I Apply Primer Before Skim Coating a Ceiling?
No—primer should come after the skim coating step.
- First, apply a thin layer of drywall compound using a wide drywall knife.
- Let it dry completely, then sand smooth before applying primer.
Primer seals the compound and preps the ceiling for the final paint layer.
This order ensures everything bonds properly and provides long-term durability—especially important in areas like bathrooms and kitchens that take more wear.
What Happens If I Skip Primer?
Skipping primer can ruin a perfectly good paint job.
- The compound will suck in moisture, leading to uneven coverage and dull finish.
- Without primer, paint may not adhere well, causing peeling or bubbling—especially on ceilings or over seams.
- If you’re putting in the effort to prep the drywall, skipping primer just doesn’t make sense.
Think of primer as the sealer that locks everything in and gives your walls a clean, even base for whatever color you choose.
Skim Coat vs Primer: Which Should You Use for Your Walls?
Not sure which step your project calls for?
Here’s a quick breakdown to help you choose the right product:
- Use a skim coat if your walls are damaged, uneven, or heavily textured. It’s the best way to restore a smooth, paint-ready surface.
- Use primer if your surface is already in good shape but unpainted, freshly skimmed, or stained.
- For many Ann Arbor homeowners, both are needed: first skim with compound, then prime to seal and prep for paint.
If you’re working on drywall or ceilings, tackling visible seams, or just want a flawless finish, combining both is often the best solution.
Ready to Nail That Smooth Finish? Let Tribble Painting Company Handle the Details

Now that you understand the difference between a skim coat vs. primer, you’re equipped to tackle surface prep like a pro.
Knowing when to use each method can help you achieve flawless walls and longer-lasting paint in any room of your home.
But if you’d rather skip the mess, mistakes, and multiple trips to the paint store, leave it to the pros.
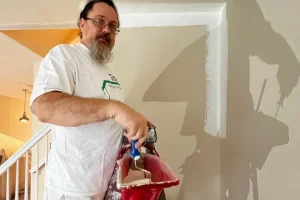
The house painters at Tribble Painting Company bring precision, expertise, and smooth results to every interior painting project in the Ann Arbor area.

