
Paint the Town Red, White, or Blue: Starting with Proper Prep!
Ever felt overwhelmed by the prospect of painting your house?
Or wondered whether there’s more to it than just slapping on a coat of paint?
Whether you’re a seasoned DIY enthusiast or a professional painter, this guide is tailored for you.
We will walk you through the essential steps of prepping both the interior and exterior of your Ann Arbor home for painting, ensuring your efforts yield professional-quality results.
From safeguarding your home’s curb appeal to enhancing the longevity of your paintwork, mastering the prep work will save you time and frustration.
By the end of this read, you’ll be equipped with practical know-how for prepping for interior home painting or exterior home painting, which will help to safeguard your investment for years to come.
Let’s roll up our sleeves and set the stage for painting success!
Importance of Preparation Before Painting

Proper preparation is the cornerstone of any successful paint job, especially when it comes to the longevity and appearance of your home’s exterior or interior.
In Ann Arbor, where the weather can go from one extreme to another, ensuring every surface is meticulously prepped can make all the difference.
General Preparation Principles
Preparation goes beyond just picking the right paint color or type; it involves a series of steps crucial for avoiding future complications and achieving a flawless finish.
Here’s what you need to know:
- Surface Inspection: Begin with a thorough inspection of the surfaces to be painted. Look for signs of damage, such as peeling paint, flaking paint, or bare wood, which can compromise the new paint job. Addressing these issues early on prevents further deterioration and ensures the new paint adheres properly.
- Cleaning: All surfaces should be free of dirt, grease, and old paint. This might involve scrubbing with a scrub brush, using a pressure washer for the exterior, or wiping down walls with a damp cloth indoors.
- Repairs: Fill holes, fix cracks, and re-caulk seams where necessary. For exterior work, this might include replacing weathered wood or repairing old siding.
- Sanding: Sanding smooths out rough edges and removes the glossy finish on previously painted surfaces, providing a better grip for the new paint. Use fine-grit sandpaper to avoid damaging the surface.
- Priming: Apply a primer, especially when dealing with bare wood or making drastic color changes. A good primer not only helps the paint stick but also enhances the paint’s true color.
- Taping: Use painter’s tape to protect windows, doors, and trim from accidental strokes. This ensures clean, sharp lines and professional-looking results.
By adhering to these preparation steps, you not only ensure that your paint job will look great but also that it will last longer, resisting the typical challenges posed by Ann Arbor’s variable climate.
How to Prepare Your House Interior for Interior Painting
A pristine paint job starts with a well-prepared canvas.
Inside your Ann Arbor home, each room needs careful attention to ensure the new paint not only looks beautiful but also lasts.
Here’s how to set the stage for a superb interior painting experience.
Tools and Materials Needed for Interior Preparation
Before diving into the painting process, gather all the necessary tools and materials to streamline your work and avoid interruptions.
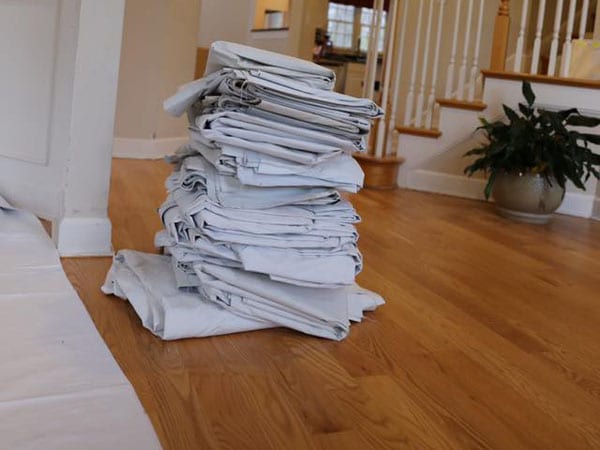
- Drop cloths: Essential for protecting floors and furniture from spills and splatters.
- Painter’s tape: For crisp lines and protecting windows, doors, and trim.
- Spackle or putty: To fill holes and smooth out imperfections in walls.
- Fine-grit sandpaper: For sanding down patched areas and ensuring surfaces are smooth for painting.
- Primer: Especially crucial when covering dark walls with a lighter paint color or on porous surfaces.
- Brushes and rollers or paint sprayer: Depending on the texture and size of your walls.
- Extension poles: For reaching high areas without the constant need for a ladder.
By having these tools at the ready, you can ensure that your prep work is efficient and thorough, leading to a better final paint job.
1. Room and Surface Preparation
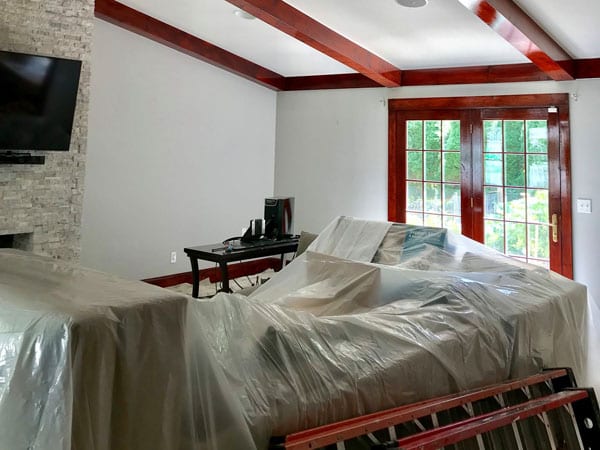
Clearing and covering the interiors properly is crucial to keep your belongings paint-free and ensure every nook gets the fresh coat it needs.
- Furniture: Move all furniture to the center of the room and cover with drop cloths.
- Fixtures: Remove or cover light fixtures and outlet covers to prevent paint splatters.
- Floors: Lay down drop cloths across all flooring areas to catch drips and accidental spills. Tape them down at the edges to prevent slips and paint seepage.
- Taping: Put painter’s tape around windows, doors, and baseboards. Painter’s tape, also known as blue tape, is a good tool to guard against paint seepage. It has a low-stick adhesive that adheres firmly but not permanently. It is easy to remove and won’t peel existing paint or primer when it comes off. Even though it may be costly at first glance, its use on borders–such as between walls and ceilings–is a wise investment that will reap dividends in the long run.
Taking these steps helps safeguard your interior and provides a hassle-free space to work in, allowing you to focus on the task at hand.
2. Wall Repair and Sanding
To achieve smooth and even walls, meticulous repair and sanding are necessary.
- Fill holes and cracks: Use spackle or joint compound to fill any imperfections. Once dry, these areas should be sanded smooth.
- Sand rough areas: Using fine-grit sandpaper, sand down any rough patches or areas where the existing paint has flaked off to ensure a smooth base for the new paint.
This preparation ensures that the new paint adheres properly and results in a seamless finish, reflecting the care taken in these initial steps.
3. Cleaning and Degreasing
Clean walls are vital for the paint to adhere correctly and for achieving a clean, professional look.
- Dust and wash walls: Use a damp cloth to remove any dust or cobwebs, and wash walls with a mild detergent if necessary, especially in areas like kitchens or bathrooms where grease may build up. Krud Kutter makes a product specifically for paint prep.
- Allow walls to dry: Before applying primer or paint, ensure the walls are completely dry to prevent issues with adhesion.
Proper cleaning not only helps the paint adhere better but also prevents defects in the paint layer, contributing to a more durable and visually appealing finish.
4. Applying Primer
Primer is pivotal for a uniform and vibrant finish, especially when undertaking significant color changes or painting over dark shades.
- Choose the right primer: Select a primer based on the type of paint you will use (e.g., oil-based or latex) and the surface condition.
- Apply evenly: Use rollers or brushes to apply primer evenly, covering all areas that will receive paint.
Using primer not only enhances paint adhesion but also ensures that the true color of the paint shines through, providing a robust base that extends the life of your paint job.
Now you are ready to paint your home’s interior!
But before you start, be sure to check out our blog on how to fix paint streaks on walls (and avoid them).
Now let’s delve into the prep for exterior painting.
How To Prepare Your House Exterior for Exterior Painting
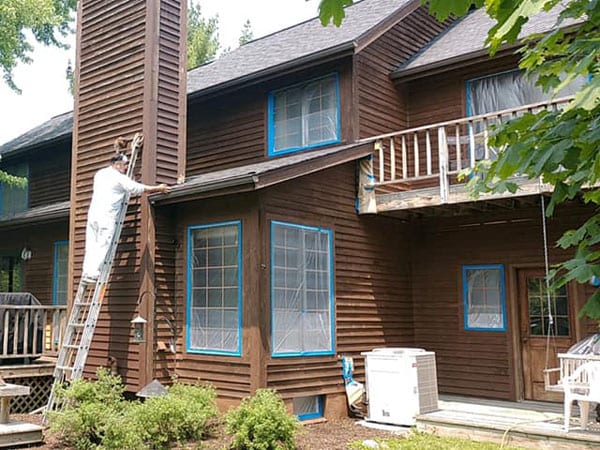
For those tackling an exterior paint job in Ann Arbor, Michigan, meticulous preparation of your home’s exterior is key to enduring beauty and protection against the elements.
Let’s delve into how to prep your home’s exterior surfaces for painting, ensuring your work not only looks great but stands up to the local climate.
Tools and Materials Needed for Exterior Preparation
Equipping yourself with the right tools can simplify the preparation process for your home’s exterior.
- Pressure washer: Pressure wash to remove dirt and loose paint, ensuring a clean surface for the new paint.
- Paint scrapers and wire brushes: Essential for scraping off peeling paint and smoothing rough surfaces.
- Sanding blocks or power sanders: To smooth the surface after scraping.
- Exterior caulk: For sealing gaps and cracks in siding and around windows to prevent moisture ingress.
- Exterior latex primer: Prepares the siding, enhancing paint adhesion and durability.
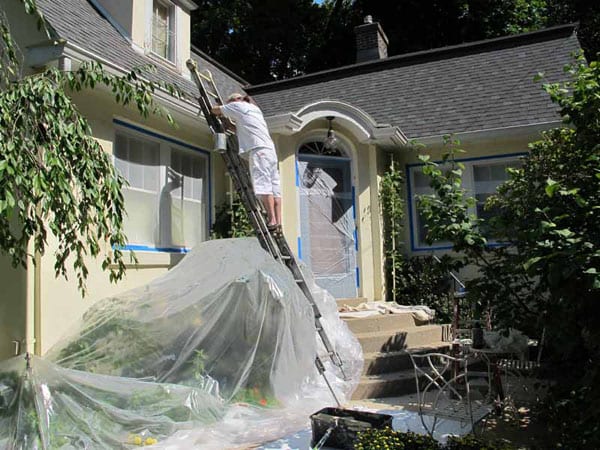
- Drop cloths: Protect landscaping and patio furniture from paint splatters and spills.
- Plastic sheeting: Use lightweight cloth or plastic sheeting to cover plants close to the painting area.
These tools are fundamental for achieving a clean and prepared surface, which is crucial for a successful exterior paint job.
1. Replacing Damaged Materials
Inspect and replace any compromised materials to ensure a solid foundation for your new paint.
- Check for rot: Replace rotten wood before painting to avoid further damage.
- Inspect siding and trim: Look for warping, rot, or damage, particularly in older homes that may have lead-based paint, which requires special handling.
- Metal surfaces: Remove rust from aluminum siding or other metal fixtures; prime with a rust-inhibiting primer.
Replacing damaged materials not only improves the appearance of your paint job but also extends the life of your home’s exterior by protecting it from future damage.
2. Caulking and Sealing
Sealing gaps and cracks is a critical step to protect your home against weather and pests.
- Apply exterior caulk: Seal around windows, doors, and other openings.
- Check old caulking: Replace any that is cracked or peeling to maintain a moisture-resistant barrier.
- Ensure proper sealing: This helps prevent moisture intrusion, which is critical in preventing mold and wood rot.
Caulking and sealing not only prepare the surface for painting but also enhance the energy efficiency and comfort of your home.
3. Surface Preparation
Proper surface preparation is crucial for a paint job that looks professional and lasts.
- Pressure wash: Clean off all dirt, mildew, and debris. Allow the surface to dry completely before proceeding. This step is essential in cleaning the home’s exterior thoroughly before painting, but caution should be taken to avoid using excessive pressure that may damage the siding or wood.
- Scrape off loose and flaking paint: Use a paint scraper or wire brush to remove any peeling paint.
- Sand rough spots: Smooth out any rough areas with sanding blocks to ensure even application of new paint.
- Clean up sanding dust: Remove all dust from sanding to prevent it from mixing with the paint.
- Prime if needed: If you’re using a new color over an old one, bear in mind that priming can increase durability–talk to an expert if unsure how best to proceed!
This thorough cleaning and smoothing of the exterior not only ensures better paint adhesion but also contributes to the overall quality and longevity of the paint job.
Follow the link to discover the cost of exterior painting when you hire a professional painter.
Weather Considerations for Exterior Painting
Choosing the right time for exterior painting is crucial, especially in a climate like Ann Arbor’s.
- Avoid extreme heat and direct sun: Paint can dry too quickly, which can lead to uneven application and poor adhesion.
- Look for good weather: Ideal painting conditions are dry and mild. Avoid painting in damp or very cold conditions.
Monitoring the weather ensures that your hard work yields the best possible results, preventing issues like blistering or peeling due to adverse conditions.
This careful timing can significantly enhance the effectiveness of your exterior paint job.
Bonus: Pro Tips From a Professional Painter
- Pro tip #1: Outlets have small parts. They get lost easily, so tape outlet hardware to the back of the outlets or put them in separate baggies.
- Pro tip #2: Are you looking for a secret tool that the pros use? Look no further than masking film! This thin plastic sheet, available in rolls or folded-up squares, is ideal for DIY painters who may not know about it. Due to its thinness, masking film sticks easily onto flat surfaces without needing tape. The static electricity present holds the masking film immovably in place–all you need to do is bring it close to the painted edges and let nature take over!
- Pro tip #3: Buy some latex or nitrile gloves. Keep your hands pristine while painting with the assistance of latex gloves. While water-based interior latex paint comes off easily, oil and enamel paints can present a hassle when cleaning up. If you’re sensitive to or dislike wearing latex gloves, try nitrile instead–-it offers the same protective benefits without compromising comfortability.
- Pro tip #4: For a professional-looking finish on doors and trim, consider using flat paint. This type of paint is recommended for these surfaces due to its ability to hide imperfections and provide a smooth finish. For the best results, apply flat paint using a sprayer and then use a backrolling technique. This method ensures an even coat and a flawless appearance.
- Pro tip #5: If you are prepping for professional painters, do everything you can to ensure easy access to the exterior of your home. This includes trimming back any trees or shrubs close to the home, storing outdoor furniture cushions, and closing all the windows.
- Pro tip #6: Don’t remove picture hangers. Leave the nails on the wall if you want to hang art and such in the same place.
- Pro tip #7: Protect your recessed lighting. For recessed lights, remove the bulb and pull the fixture’s trim down a bit. Release the cover and tape plastic over it.
If you go the DIY route, you will want to do all the above tasks yourself.
If you are hiring a professional painter, they will handle these tasks for you.
However, they may charge a little bit more if you haven’t done any prep work at all (such as moving furniture).
If you prefer to DIY your painting project, follow the link to learn how to paint a house–inside and out!
Discover the Difference with Tribble Painting Company
We’ve covered everything you need to know about prepping your home for a painting overhaul, both inside and out.
With these tips, you’re well-equipped to tackle any painting project, ensuring durability and a professional finish that enhances your home’s appeal.
Handling both interior and exterior painting needs, Tribble Painting Company stands ready to transform your space with precision and skill.
Let us take the hassle out of painting, allowing you to relax and enjoy the flawless results.
Ready to see how Tribble Painting Company can make your home shine?
Fill out our contact form today, or give us a call!

